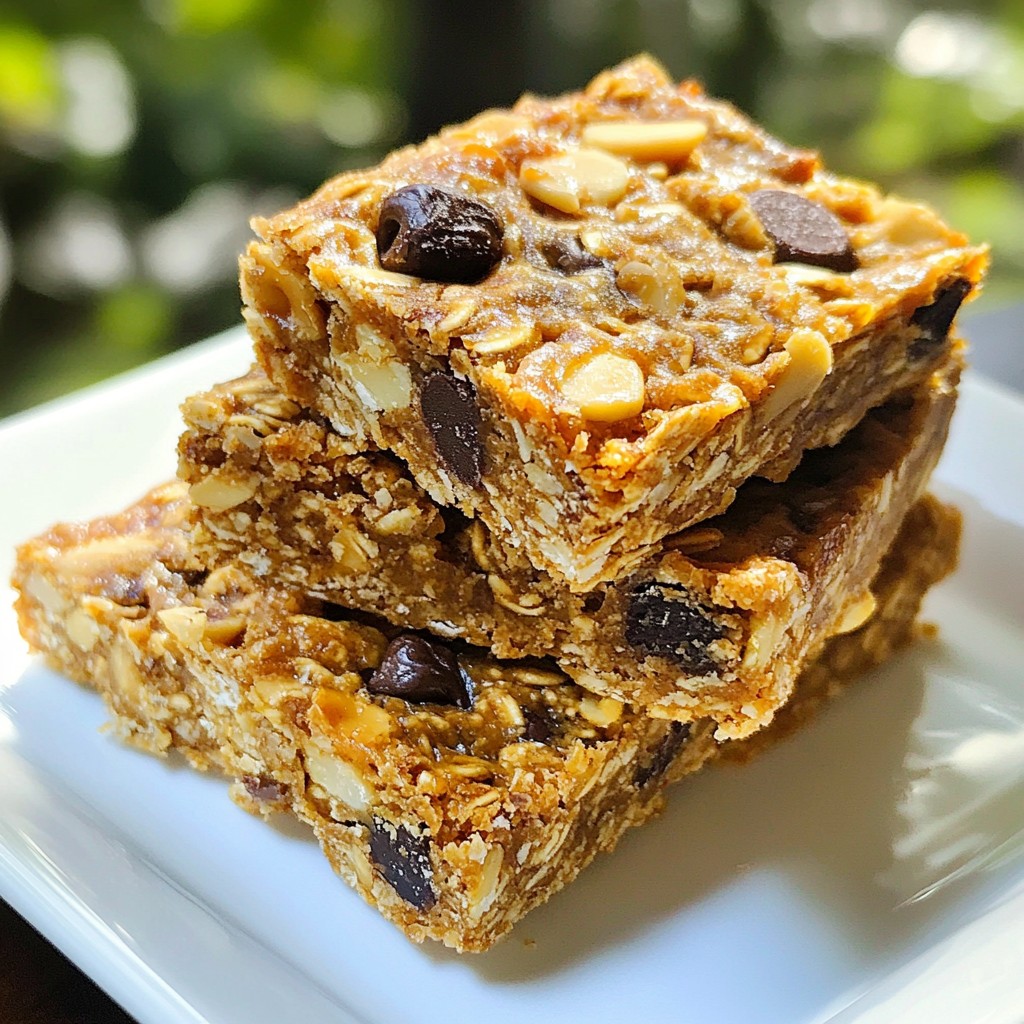
Looking for a quick, tasty snack that fuels your day? You'll love these Peanut Butter Oatmeal Energy Bars! They’re simple to make and packed with good stuff like oats, nuts, and a touch of sweetness. Whether you need a pre-workout boost or a midday pick-me-up, this recipe will guide you through easy steps. Let's dive in and whip up a batch that everyone will enjoy!
Why I Love This Recipe
- Quick and Easy: This recipe takes only 10 minutes to prep, making it perfect for a busy lifestyle.
- Customizable: You can easily swap in your favorite nuts, dried fruits, or even add seeds to make it your own!
- Nutritious Snack: Packed with oats, nuts, and natural sweeteners, these bars offer a healthy boost of energy.
- Perfect for Meal Prep: These bars store well, so you can make a batch ahead of time for a week’s worth of snacks.
Ingredients
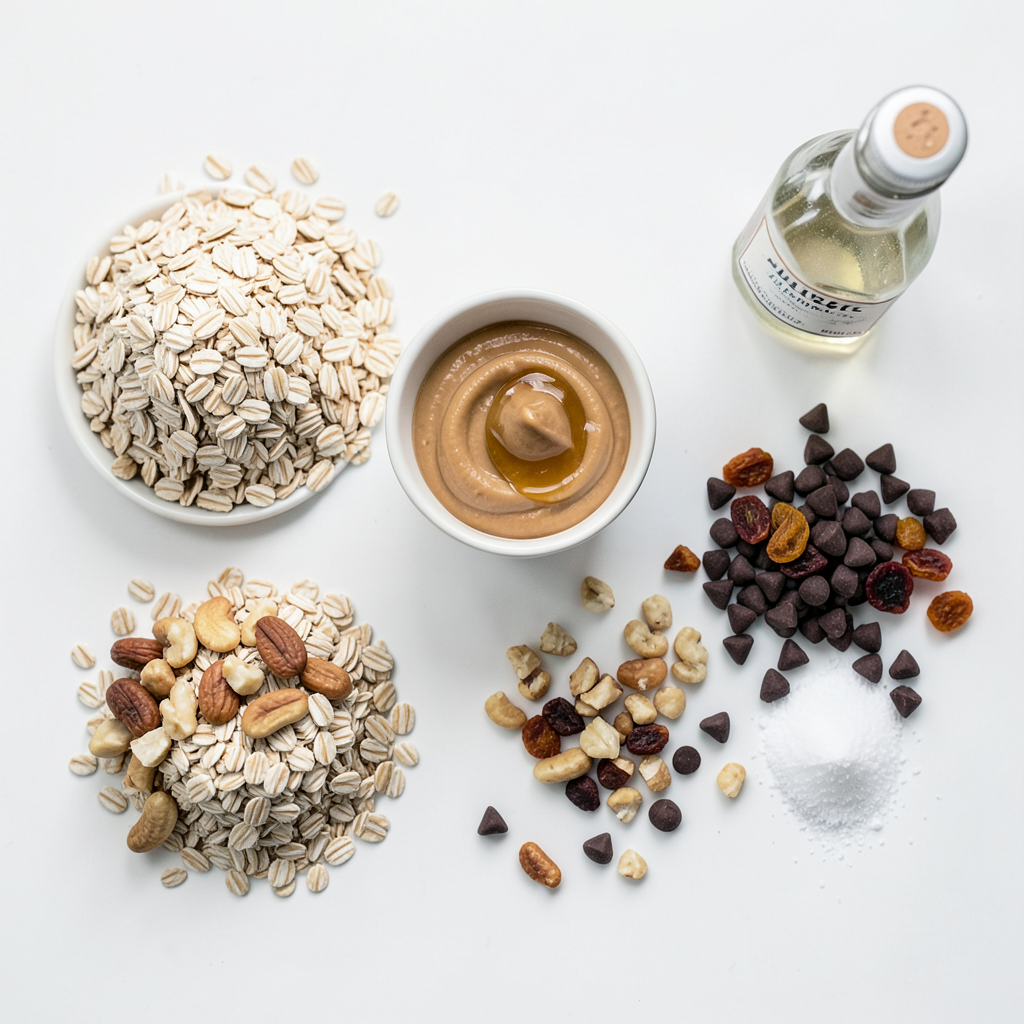
To make these Peanut Butter Oatmeal Energy Bars, you need simple and wholesome ingredients. Here’s what you will need:
- 1 cup old-fashioned rolled oats
- 1/2 cup natural peanut butter
- 1/4 cup honey (or maple syrup for a vegan option)
- 1/2 cup chopped nuts (like almonds or walnuts)
- 1/4 cup chocolate chips (dark or dairy-free)
- 1/4 cup dried fruit (such as raisins or cranberries)
- 1/4 teaspoon salt
- 1/2 teaspoon vanilla extract
Each ingredient plays a key role. The rolled oats provide a hearty base. Peanut butter adds creaminess and protein. Honey or maple syrup gives a touch of sweetness. Chopped nuts add crunch and nutrients. Chocolate chips bring joy, while dried fruit gives a chewy texture. Salt enhances all the flavors, and vanilla extract adds a warm note.
Feel free to mix and match nuts and dried fruits to suit your taste. These ingredients make the bars easy, tasty, and healthy.
Step-by-Step Instructions
Prepping the Oven and Baking Dish
First, set your oven to 350°F (175°C). Next, grab an 8x8-inch baking dish. Line it with parchment paper. Leave some paper hanging over the sides. This makes it easy to lift the bars out later.
Mixing Dry Ingredients
In a large bowl, add 1 cup of old-fashioned rolled oats. Then, toss in 1/2 cup of chopped nuts. You can use almonds or walnuts. Next, add 1/4 cup of chocolate chips and 1/4 cup of dried fruit, like raisins or cranberries. Finally, sprinkle in 1/4 teaspoon of salt. Stir everything well to combine.
Combining Wet Ingredients
In another bowl, mix 1/2 cup of natural peanut butter with 1/4 cup of honey. If you prefer, you can use maple syrup instead. Add 1/2 teaspoon of vanilla extract for extra flavor. Stir until the mixture is smooth and creamy.
Mixing and Pressing the Mixture
Pour the peanut butter mixture into the bowl of dry ingredients. Stir until all the dry bits are coated. This step is key for great flavor. Once mixed, transfer it to the lined baking dish. Press it down firmly with a spatula or your hands. Make sure it is compact and even.
Baking the Bars
Place the dish in the oven. Bake the bars for 15-20 minutes. Look for golden edges, which show they're done. Keep an eye on them to avoid burning.
Cooling and Cutting the Bars
After baking, take the dish out and let it cool for about 10 minutes. Use the parchment paper to lift the bars out. Put them on a cutting board. Let them cool completely before cutting into squares or rectangles. Store the bars in an airtight container. Enjoy your tasty treat!
Tips & Tricks
Achieving the Perfect Texture
To get the right texture in your bars, use old-fashioned rolled oats. These oats are thicker and give a chewy bite. If you want a softer bar, use quick oats instead. When mixing, make sure you press the mixture firmly in the pan. This helps the bars hold together when cut. Bake until the edges are golden brown. This gives the bars a nice crunch.
Substitutions for Dietary Needs
You can easily adjust this recipe for your needs. For a nut-free option, use sun butter or soy nut butter instead of peanut butter. If you're vegan, swap honey for maple syrup. For gluten-free bars, ensure your oats are certified gluten-free. You can also change the nuts. Use seeds like pumpkin or sunflower if you want to avoid nuts.
Enhancing Flavor and Nutritional Value
Want more flavor? Try adding spices like cinnamon or nutmeg. These spices make the bars warm and tasty. You can also mix in protein powder for extra nutrition. Adding a scoop of protein powder boosts the protein content. To add some zest, try orange zest or lemon zest. This brightens the flavor and makes your bars stand out!
Pro Tips
- Use Natural Peanut Butter: Opt for natural peanut butter without added sugars or oils for a healthier option.
- Customize Your Add-ins: Feel free to swap out nuts, chocolate chips, or dried fruit to suit your taste preferences or dietary needs.
- Press Firmly: Ensure to press the mixture firmly into the baking dish to help the bars hold together after baking.
- Cool Completely: Allow the bars to cool completely before cutting to prevent them from crumbling.
Variations
Different Nut and Fruit Combinations
You can mix and match nuts and fruits in these bars. Try almonds or walnuts for crunch. You can also use pecans or cashews. For dried fruits, raisins and apricots work great. You can even add coconut flakes for a tropical twist. Just keep the total amount of nuts and fruits the same.
Vegan and Gluten-Free Options
If you want a vegan version, swap honey for maple syrup. This keeps the bars sweet and sticky. For gluten-free options, use certified gluten-free oats. This way, everyone can enjoy these tasty treats. You can also check your nut butter to ensure it's gluten-free.
Flavor Add-Ins like Spices or Extracts
Spices can add a fun kick to your bars. Try adding a pinch of cinnamon for warmth. You can also use nutmeg for a cozy flavor. For a sweeter touch, add a splash of almond or coconut extract. These little changes can make your bars feel special and unique.
Storage Info
Best Practices for Storage
To keep your Peanut Butter Oatmeal Energy Bars fresh, use an airtight container. This helps prevent them from drying out. Store them at room temperature for quick snacks. If you live in a warm climate, the fridge is a better option. The cool air helps maintain their texture and taste.
How to freeze Energy Bars
Freezing these bars is easy. Cut them into pieces first. Place the bars in a single layer on a baking sheet. Freeze them for about one hour. Once they are firm, transfer them to a freezer-safe bag. Be sure to label the bag with the date. These bars can last up to three months in the freezer.
Shelf Life of Peanut Butter Oatmeal Energy Bars
If stored properly, these energy bars can last about one week at room temperature. In the fridge, they stay fresh for up to two weeks. Freezing extends their life to three months. Always check for any change in smell or texture before eating. This helps ensure you enjoy them at their best!
FAQs
Can I make these without honey?
Yes, you can use maple syrup instead. It works well and keeps the bars sweet. Maple syrup is a great vegan option too. Both sweeteners help bind the bars and add flavor.
How do I know when the bars are done baking?
The bars are done when the edges turn golden brown. You can check them at around 15 minutes. If they look golden, take them out. If not, bake for a few more minutes. Keep a close eye to avoid over-baking.
What are the health benefits of Peanut Butter Oatmeal Energy Bars?
These bars pack a good amount of protein and fiber. The oats help with digestion and keep you full. Peanut butter adds healthy fats. Nuts and dried fruit give extra nutrients and vitamins. They are a tasty way to fuel your day.
Can I add protein powder to this recipe?
Yes, you can add protein powder. Start with a couple of tablespoons. Mix it with the dry ingredients. This boosts the protein content and makes them even more filling. Just make sure to adjust the wet ingredients if needed.
How should I cut and serve the bars?
After cooling, use a sharp knife to cut the bars. Aim for square or rectangular pieces. You can serve them right away or store them for later. They make great snacks for any time of day.
You learned how to make Peanut Butter Oatmeal Energy Bars with simple ingredients. We covered each step, from mixing to baking. I shared tips for texture and custom variations. Storing the bars correctly helps keep them fresh. These bars are healthy, tasty, and easy to make. You can adjust the recipe to fit your needs. Enjoy creating your own snacks that boost energy and satisfy cravings. Get ready to dig in and share with friends. Happy baking!