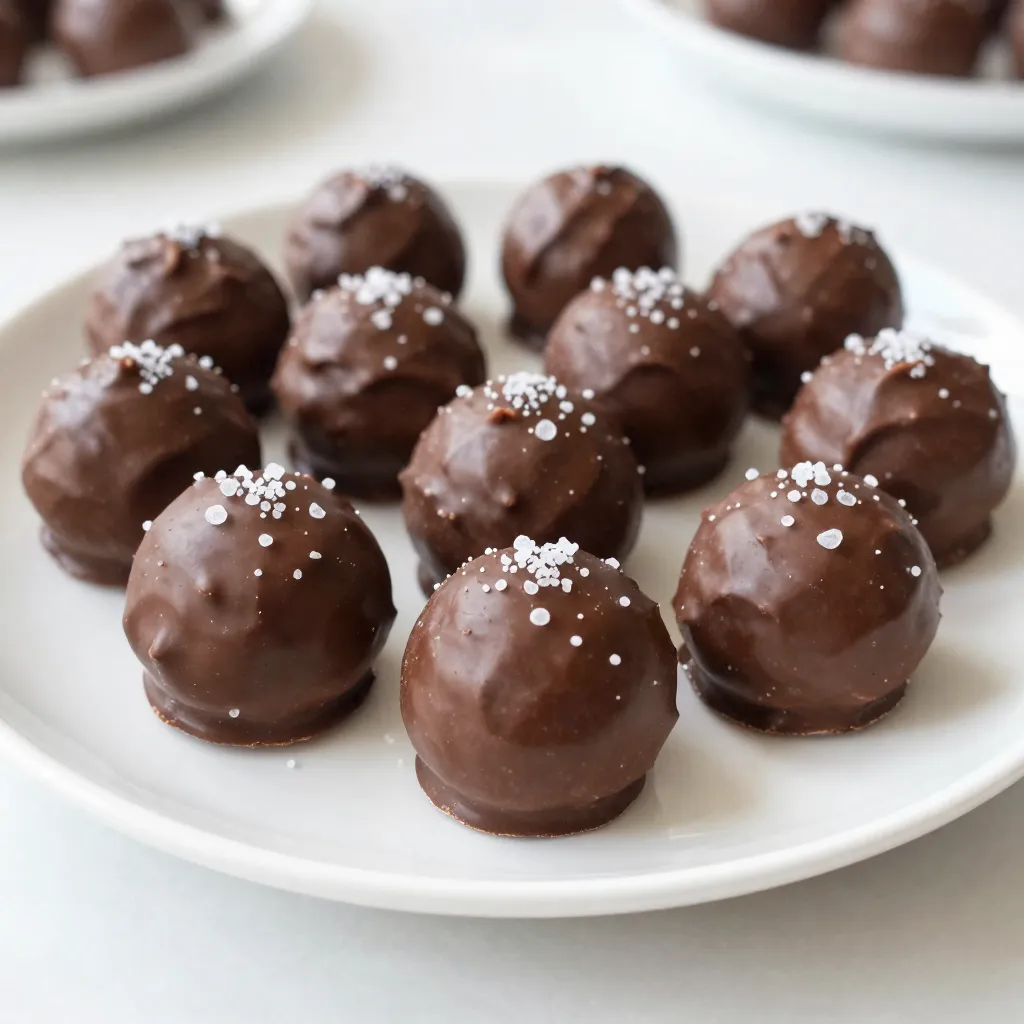
If you love sweet treats during the holidays, you will adore this Festive Butterfinger Balls recipe! These simple bites combine rich flavors and a fun texture, making them perfect for sharing. I’ll guide you step-by-step through the process, from gathering ingredients to tips for storage. Whether you’re hosting a party or giving gifts, these tasty treats will impress everyone. Ready to make some holiday magic? Let’s get started!
Why I Love This Recipe
- Easy to Make: This recipe requires minimal ingredients and simple steps, making it perfect for bakers of all skill levels.
- Decadent Flavor: The combination of Butterfinger and peanut butter creates a rich, indulgent taste that everyone loves.
- Perfect for Celebrations: These festive balls are a hit at parties, holidays, and gatherings, adding a sweet touch to any occasion.
- Fun to Make: Rolling the balls and dipping them in chocolate is a fun activity, especially for kids and families to enjoy together.
Ingredients
Complete List of Ingredients
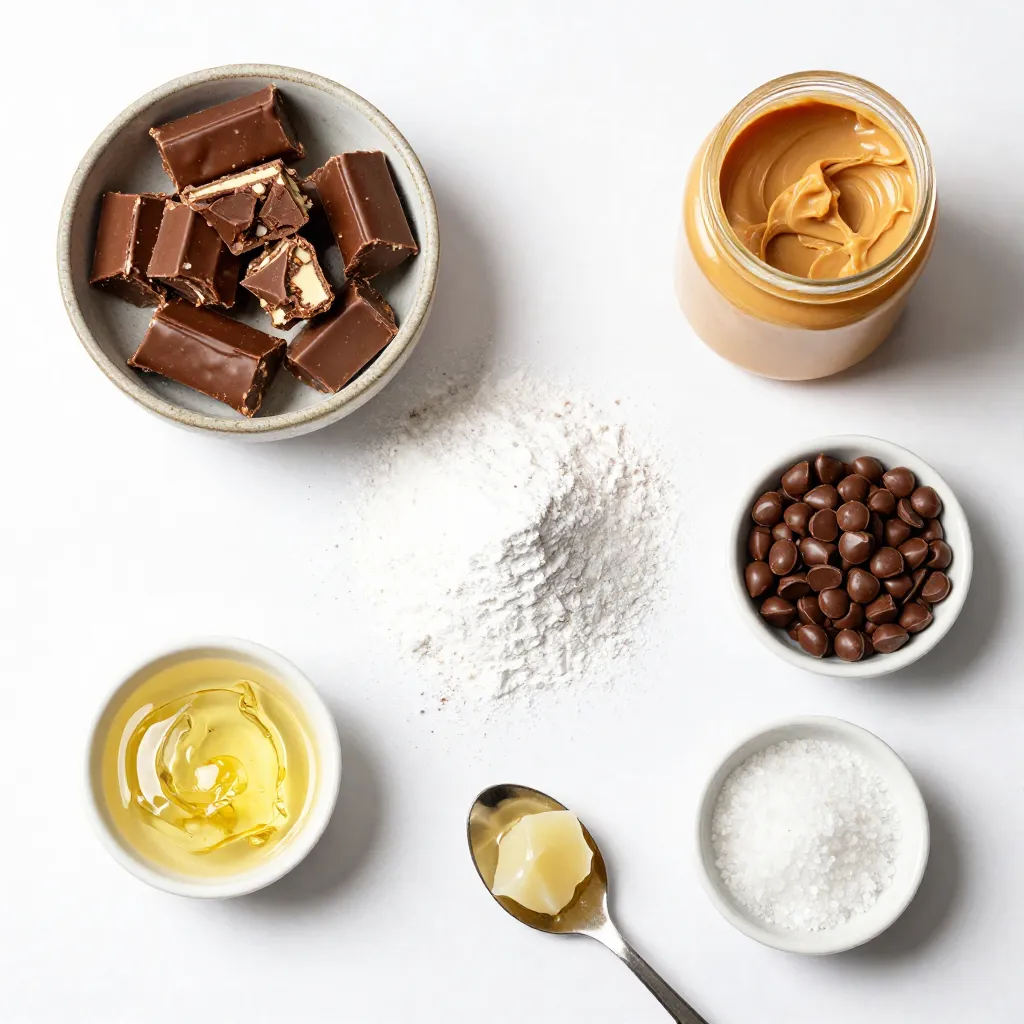
To make these festive Butterfinger balls, you will need:
– 1 cup Butterfinger candy bars, crushed
– 1 cup creamy peanut butter
– 1 cup powdered sugar
– 2 cups semi-sweet chocolate chips
– 1 tablespoon coconut oil (or vegetable oil)
– Sea salt (for sprinkling, optional)
These ingredients come together to create a sweet and crunchy treat that everyone will love.
Ingredient Substitutions
You can make some fun swaps if you need to. Here are a few ideas:
– Use crunchy peanut butter for a bit more texture.
– Swap Butterfinger bars for other candy bars like Reese’s or Snickers.
– Use dark chocolate chips instead of semi-sweet for a richer flavor.
– If you want to avoid coconut oil, any vegetable oil works well.
These changes can give your Butterfinger balls a unique twist.
Equipment Needed
Gather these tools to help you make your festive treat:
– Mixing bowl
– Spatula or your hands for mixing
– Baking sheet
– Parchment paper
– Microwave-safe bowl for melting chocolate
– Fork for dipping the balls in chocolate
Having the right equipment makes the process smooth and fun.
Step-by-Step Instructions
Preparing the Mixture
Start by crushing the Butterfinger candy bars. You want them in small pieces. Use a food processor or place them in a bag and smash them with a rolling pin. Next, grab a mixing bowl and combine the crushed Butterfinger, creamy peanut butter, and powdered sugar. Use a spatula or your hands to mix. You want to blend it until it becomes a thick, sticky dough.
Rolling the Butterfinger Balls
Once you have your dough, take about one tablespoon of the mix. Roll it into a ball in your hands. Make sure it’s smooth and round. Place each ball on a baking sheet lined with parchment paper. This keeps them from sticking. After you roll all the mixture into balls, put the baking sheet in the fridge for about 30 minutes. This helps them firm up and hold their shape.
Melting the Chocolate and Coating
While your balls chill, it’s time to melt the chocolate. In a microwave-safe bowl, combine the semi-sweet chocolate chips and coconut oil. Heat this in the microwave in 30-second bursts. Stir between each burst until it’s smooth. Once melted, take the chilled balls from the fridge. Dip each ball into the chocolate, making sure it’s fully coated. Use a fork to lift them out and let any excess chocolate drip off. Place them back on the parchment paper. If you like, sprinkle a bit of sea salt on top while the chocolate is still wet. After coating all the balls, return the baking sheet to the fridge for another 15 to 20 minutes to let the chocolate set.
Tips & Tricks
Perfecting the Texture
To get the best texture for Butterfinger balls, mix the ingredients well. You want a thick and sticky dough. If the mixture feels too dry, add a little more peanut butter. If it’s too sticky, add a touch more powdered sugar. This balance helps shape the balls easily.
Storing Butterfinger Balls
Keep your Butterfinger balls fresh by storing them correctly. Place them in an airtight container. You can keep them in the fridge for up to a week. If you want to save them longer, freeze them! Just make sure to separate layers with parchment paper. That way, they won’t stick together.
Serving Suggestions
These festive treats look great on any table. You can serve them plain or add a sprinkle of sea salt for a salty twist. For a fun touch, place them in festive cupcake liners. They make perfect gifts wrapped in clear bags with ribbons. Enjoy them at parties, or share with friends and family.
Pro Tips
- Chill for Better Coating: Chilling the balls before dipping them in chocolate helps the chocolate coat evenly and prevents it from melting too quickly.
- Use High-Quality Chocolate: For the best flavor and smooth coating, choose high-quality semi-sweet chocolate chips or even chocolate bars.
- Experiment with Toppings: Get creative by adding toppings like crushed nuts, sprinkles, or even a drizzle of white chocolate for a festive touch.
- Store Properly: Keep the Butterfinger balls in an airtight container in the refrigerator to maintain their freshness and texture.
Variations
Flavor Additions
You can change up the flavor of your Butterfinger balls. Try adding a splash of vanilla extract for warmth. A hint of almond extract also works well. If you love chocolate, mix in some cocoa powder to enhance the chocolate taste. For a fun twist, add a bit of crushed pretzels for saltiness and crunch. These small changes can take your treat to the next level!
Alternative Coatings
While chocolate is a classic, you have many coating options. Try using white chocolate for a sweeter treat. You can also use milk chocolate if you want a creamier taste. For a fun look, you might sprinkle colored sugar or candy sprinkles on top right after coating. If you prefer a healthier option, consider rolling the balls in crushed nuts or coconut flakes instead.
Dietary Modifications
Making Butterfinger balls can fit different diets. For a vegan version, use dairy-free chocolate and nut butter. You can also swap the powdered sugar for a sugar substitute like stevia or monk fruit. If you need gluten-free options, ensure your ingredients are certified gluten-free. These swaps let everyone enjoy this festive treat without worry!
Storage Info
Refrigeration Tips
Keep your festive Butterfinger balls in the fridge. Use an airtight container. This will help them stay fresh and tasty. They can last about a week when stored this way. If you plan to serve them later, chilling them is a must. Just take them out 10 minutes before serving for the best taste.
Freezing Instructions
You can freeze Butterfinger balls for longer storage. Place them on a baking sheet first. Freeze them for about an hour. Then, transfer them to a freezer-safe container. They can stay in the freezer for up to three months. When you’re ready to eat them, let them thaw in the fridge overnight.
Shelf Life
These treats are best when fresh, but they have a decent shelf life. In the fridge, they last around one week. If you freeze them, they keep well for three months. Just remember, the sooner you eat them, the better they taste!
FAQs
How do I make Butterfinger Balls without a microwave?
You can melt the chocolate on the stove. Use a double boiler. Place water in a pot and heat it. Set a heat-safe bowl on top. Add chocolate chips and oil to the bowl. Stir until melted. This method works well and gives you smooth chocolate.
Can I use crunchy peanut butter instead?
Yes, you can use crunchy peanut butter. It adds a nice texture. The balls will still taste great. The flavors mix well with the crushed Butterfinger bars. Just keep in mind it will change the smoothness of the treat.
What is the best way to store leftover Butterfinger Balls?
Store leftover Butterfinger Balls in an airtight container. Keep them in the fridge. This helps them stay fresh. They will last about a week. For longer storage, freeze them. Just let them thaw in the fridge before you enjoy them again.
We explored the essentials for making Butterfinger Balls, from ingredients to step-by-step guides. Proper preparation and storage can elevate your treat. Remember to try different flavors and coatings for a unique twist. Your Butterfinger Balls can fit any diet too, with careful swaps. Follow these tips, and you’ll impress everyone with your tasty treats. Enjoy creating and sharing your delicious Butterfinger Ball